As a Quantum Developer Advocate for IBM, I present at conferences about quantum computing, and have developed an open source application that utilizes IBM quantum computers to compose and perform music. The name of the application is Quantum Music Composer, and it works with IBM quantum simulators and computers. The style of music that it helps compose and perform is a very simplified version of 17th century counterpoint. The image at the top of this article, for example, is a music score captured from an improvisational composition by an IBM 16 bit quantum computer.
The Quantum Music composer app is licensed under Apache License Version 2.0, and is available in the following GitHub repositories:
As a musician and software developer, I look for synergies between these two roles. One such example is the app that I’m developing for the purpose of helping musicians with ear training. This app, named Music Ear Trainer, contains a voice user interface (VUI) that trains the user’s ear to recognize musical constructs such as intervals and triads. If you have access to a Google Home device, you may invoke the app by saying “Hey Google, talk to Music Ear Trainer.” The app will invite you into a conversation, playing intervals and triads for you to verbally identify.
The Music Ear Trainer app uses Actions on Google to implement its Google Assistant functionality. I chose to use the API.AI tool to build my Assistant actions. The following diagram contains a portion of the conversation flow design, consisting of constructs including contexts, intents, text responses, and webhooks.
Portion of Music Ear Trainer app conversation flow
The Music Ear Trainer app is licensed under Apache License Version 2.0, and is available in the ripped-ear-vui GitHub repository. Please let me know if there is functionality you’d want to add to Music Ear Trainer, or if you have any questions about its implementation.
Presentation video of Counterpoint Composer and LinnStrument
Just a note that a presentation on Counterpoint Composer that I gave to a wonderful audience at the J-Fall conference in Holland has been published. Here’s the video, in which I play the LinnStrument to help convey concepts discussed in the presentation. And, yes, I did butcher Bach’s Prelude in C. Definitely need to do more woodshedding 🙂
Here’s the abstract for the presentation: Leveraging the power of Cloud Services, this session demonstrates how music can be analyzed and composed in real-time to augment musical performance with a futuristic instrument. This session contains an introduction to relevant cloud services, and an introduction to music theory and composition. This session also has musical demonstrations and code snippets scattered throughout.
It is hard to write a beautiful song. It is harder to write several individually beautiful songs that, when sung simultaneously, sound as a more beautiful polyphonic whole. The internal structures that create each of the voices separately must contribute to the emergent structure of the polyphony, which in turn must reinforce and comment on the structures of the individual voices. The way that is accomplished in detail is…’counterpoint’.
– John Rahn
As a part of my day job on the Pivotal evangelism team, one of my primary activities is to create demo applications and use them as a basis for technical presentations at conferences. I’d like to share with you the first such demo app, named Counterpoint Composer, located at CounterpointComposer.com
Counterpoint Composer, developed in the Java programming language, leverages rules expressed by composers such as Giovanni Pierluigi da Palestrina and Johann Joseph Fux in the 16th – 18th centuries to create counterpoint music. It also builds on the work of Bill Schottstaedt who coded those rules using the SAIL and C programming languages, and the chord analysis capabilities of JFugue by David Koelle. As an example of using Counterpoint Composer, here’s a two-minute video of creating a counterpoint tune from the melody known as Twinkle Twinkle Little Star:
If you’ll permit me to dive a bit into the software aspects of Counterpoint Composer, here’s a high-level diagram of the application:
The user interface of this application is a one-page web app that uses a dynamically embedded music notation component from Noteflight.com. As shown in the diagram above, this application also includes the following two microservices available via HTTP protocols:
CounterpointService: Given a JSON representation of the main melody, initial chord, counterpoint species, and music mode, this service returns a MusicXML representation of the resultant counterpoint composition.
ChordAnalyzerService: This service analyzes a set of musical notes to see if they represent a musical chord, returning the name of an identified chord.
Here is an illustration of these services, including how the CounterpointService uses the ChordAnalyzer service:
Getting up to speed with Counterpoint Composer
The best way to get up to speed with Counterpoint Composer is to follow the guidance of the Getting Started tutorial which is available in the app’s Help -> Getting Started menu item:
The resources in the Getting Started tutorial demonstrate how to generate each of the five species of counterpoint, and how to select various scale modes. The tutorial also demonstrates how to disable one or more of the 70+ counterpoint rules in the following dialog to see/hear the effects on the composition:
In addition, the Help -> Technical Presentation menu item contains slides that give a technical perspective of the application.
Independently demonstrating the ChordAnalyzerService with the Web MIDI API
The penultimate slide in the deck mentioned previously contains the following diagram of how the ChordAnalyzerService may be demonstrated with a MIDI keyboard connected to a computer that has a Chrome browser. Opening the Chord Analyzer Client web app in the browser and playing simultaneous notes on the MIDI keyboard should result in the chords being identified and displayed as shown below:
Please note that it is best to use the Chrome browser, as that is currently (Nov 2015) the only one that supports the Web MIDI API. I’m sure that you recognize the innovative instrument in the diagram above is a LinnStrument (the current focus of this blog) but any conventional MIDI keyboard controller should work as well.
Downloading the source code
The microservices described are running in Cloud Foundry at Pivotal Web Services, so the application links above should always be available. The source code is licensed under Apache License 2.0 and may be download from the following GitHub repositories:
Guest article by Jeremy Cubert honoring Adolphe Sax
In Part I of this series, I introduced the topic of Getting “Real” on LinnStrument. In Part II, let’s explore playing a modeled saxophone on LinnStrument. As most keyboard / synthesizer / sampler players know, saxophone presets on keyboard instruments leave much to be desired. Often, the basic sound is fairly accurate, but any attempt to move the pitch or tonality around like a saxophone player gives away the fact the listener is hearing a poor imitation of a saxophone. Antoine-Joseph “Adolphe” Sax (inventor of several instruments including the saxophone) probably would have desired higher audio fidelity of his brainchild by electronic instruments 170 years later. Fortunately, the synergistic effect of some recent innovations have enabled dramatic improvements.
Sound Generators
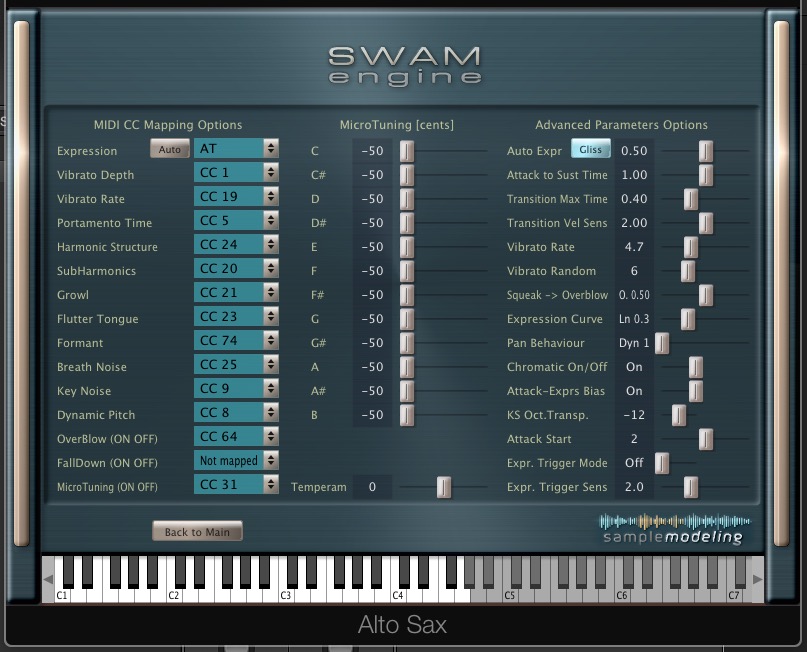
Roger Linn’s LinnStrument website has a handy page summarizing Recommended Sound Generators. Sample Modeling instruments are listed under Single-Channel MIDI Sound Generators With Special Advantages for LinnStrument. With respect to Sample Modeling instruments like “The Saxes,” this is a bit of an understatement. While missing certain features (like Y-axis control), these instruments have leapt ahead in realism, especially when combined with LinnStrument.
Sample Modeling “The Saxes” use their own SWAM (Synchronous Wavelength Acoustic Modeling) engine. While the SWAM engine has preferred features for use with LinnStrument (e.g., Y-axis control), it can only be used as a DAW (digital audio workstation) plug-in and is not a standalone instrument.
For those not experienced in the minutia of MIDI (myself included!), Roger provides recommended settings for using LinnStrument with “The Saxes.” There are two pages for settings on each saxophone instrument (Soprano, Alto, and Baritone) – main page and options page as shown below:
Sax configuration main page
Sax configuration options page
For convenience, I saved presets for each saxophone in Logic Pro to avoid the process of entering the various parameters each time I use an instrument. Your DAW may also have the ability to save instrument presets.
Although designed to be played on a standard piano keyboard or with a wind controller, the Sample Modeling instruments are ideally suited for LinnStrument because you can access multiple articulations without lifting your finger off the playing surface. For realistic playing, this feature is key.
Thinking Like a Sax Player
Unlike playing a note on a piano, playing a saxophone note is a complex combination of mouth and breath control and pressing the appropriate key combinations on the instrument. Not only does the sax player need to play a particular note at a particular time, she also needs to move from one note to another musically using articulations such as slide, slur, and staccato. Realism in imitating a saxophone is more about what happens between the notes using these articulations.
Thinking like a saxophone player requires not only thinking about the notes you want to play and their duration, but how to get from one note to another. Do you want to play staccato or legato? Slur the notes? Ascend chromatically? On top of these decisions, you need to be aware of the dynamics which can be carefully controlled through breath control.
Many advanced sample libraries provide these articulations through key switches (e.g., press a key to switch to a desired articulation). However, using key switching can be cumbersome and requires timing the key switching with one hand while playing with the other. What if you also want to bend the pitch? That requires another hand to move the wheel and yet another hand to change the modulation. The LinnStrument provides one surface to achieve all of these articulations.
Breath Control
As a wind instrument, dynamic control of a saxophone comes from breath control. On LinnStrument, pressure is the proxy for breath control. I found adjusting the velocity and pressure sensitivity settings on LinnStrument was helpful to varying degrees, depending on the saxophone instrument I was playing (Soprano, Alto, and Baritone). Velocity and Pressure Sensitivity can be adjusted under Global Settings as shown below:
Configuring LinnStrument Velocity and Pressure Sensitivity
Reducing the pressure sensitivity was helpful for higher register playing. Breath control was the most difficult articulation to control for me because of how sensitive the virtual instrument is to changes in pressure.
Sliding and Pitch Bend
After selecting the appropriate pitch bend setting (+/- 12) (under Per-Split Settings -> Bend Range -> 3rd button down from the top row), I found sliding between notes to be very easy and natural as long as I maintain control over the pressure. Slight variations in pressure can cause unwanted squealing from the instrument.
The instrument also has a very sophisticated slurring feature – if you hold down a first note and press a second note while still holding the first note, the note values will slide up chromatically in a very realistic way. However, if you do not want the “chromatic slide” you have to be sure to lift your finger off of the first note before you play the second (Note: These are all monophonic instruments).
Examples
Here is a video of one of my first attempts at playing the Sample Modeled Alto Sax:
At this point, I was still having difficulty fully controlling the pressure sensitivity. This improved over time, and I began to appreciate the dynamic range that you can achieve by combining the pressure sensitivity of LinnStrument with the breath control sensitivity of the Sample Modeling’s Saxophone instruments. I suggest adjusting the pressure control on the LinnStrument to find a comfortable setting for your playing.
Below is a video example in a trio context (bass, drums, soprano saxophone). Here, I am using a lighter touch which helps with control of the dynamics and pitch slides.
Suggested Approach
First, you will need to take the time to install the instrument and make the technical adjustments in the plug-in itself and the LinnStrument. The links above should help you with this task. It is very important to adjust the pitch bend setting to +/- 12 on the LinnStrument to take advantage of the full range (12 semitones) of the instrument for sliding.
Second, take the time to get used to the breath control/pressure sensitivity and make adjustments on the LinnStrument. There are three settings for High, Medium, and Low along the bottom row in the settings panel.
Third, practice articulating between notes – staccato, sliding your finger into the next note, and the slurring feature (holding down the first note and holding down a second note for the chromatic slur).
Above all, have fun!
Jeremy Cubert
Jeremy Cubert
Jeremy Cubert is a solo artist and member of the jazz fusion band Apothecary (www.apothecaryband.com) and international progressive rock band Formativ (www.soundcloud.com/formativ). He has recorded with Jon Anderson and Billy Sherwood of Yes and the bands Quest, Zapotec, History of Ties, and the Archaic Revival.
While primarily a piano and keyboard player, Jeremy has studied and played instruments including the Chapman Stick, LinnStrument, Zendrum, Eigenharp, guitar, Godin MultiOud, and trumpet.
All screen shots used in this blog post are used with permission from Roger Linn Design. The saxophone image is a Public Domain image via Wikimedia Commons.
In the Domo Arigato Tempo Rubato article we discussed that each note pad on the LinnStrument playing surface has three dimensions of musical expression: Moving your finger along the X-axis varies pitch, moving it on the Y-axis influences timbre, and varying its pressure on the Z-axis controls loudness. Given that each note pad has three dimensions of control, and each dimension has a resolution of 128 values, there is much expressiveness to be explored in each note being played. Because LinnStrument is a polyphonic instrument, you can play several notes simultaneously which further increases the potential for expressiveness. The trade-off is that the more fingers you’re simultaneously employing, the less focused you can be on the expressiveness of a given note.
As part of my musical journey with LinnStrument, I’m exploring ways to exploit more fully both its expressive and polyphonic capabilities. One tool that I’m using for this purpose is the Logic Pro Scripter MIDI plug-in. Scripter enables a developer to write Logic Pro extensions in JavaScript that process MIDI events as well as generate them. To help me grok the Logic Pro Scripter API I created the quick reference located in the following section.
Logic Pro Scripter API quick reference
The following tables in this quick reference includes information gleaned from the Apple Logic Pro Effects manual, example scripts such as Guitar Strummer included with Logic Pro, and the following file from the Logic Pro X installation on my Mac.
/Applications/Logic Pro X.app/Contents/Frameworks/
 MADSP.framework/Versions/A/Resources/EventTypes.js
Scripter – Global attributes and functions
NeedsTimingInfo:boolean
Defining NeedsTimingInfo as true at the global scope enables the GetTimingInfo() function
ResetParameterDefaults:boolean
Sets UI controls to default values
HandleMIDI(Event)
This function is called each time a MIDI event is received by the plug-in, and is required to process incoming MIDI events. If you do not implement this function, events pass through the plug-in unaffected.
ProcessMIDI()
This function is called once per “process block,” which is determined by the host’s audio settings (sample rate and buffer size). This function is often used in combination with the TimingInfo object to make use of timing information from the host application. To enable the GetTimingInfo feature, add NeedsTimingInfo = true at the global script level.
ParameterChanged(integer, real)
This function is called each time one of the plug-in’s parameters is set to a new value. It is also called once for each parameter when you load a plug-in setting.
Reset()
This function is called when the plugin is reset
Trace(value)
Prints a message to the console that represents the supplied value of any type
GetTimingInfo():TimingInfo
Retrieves a TimingInfo object, which contains timing information that describes the state of the host transport and the current musical tempo and meter.
GetParameter(string):real
Returns a given parameter’s current value. GetParameter() is typically called inside the HandleMIDI() or ProcessMIDI() functions.
Event – Base class for all events
send()
Send the event
sendAfterMilliseconds(ms:real)
Send the event after the specified value has elapsed
sendAtBeat(beat:real)
Send the event at a specific beat in the host’s timeline
sendAfterBeats(beats:real)
Similar to sendAtBeat(), but uses the beat value as a delay in beats from the current position.
trace()
Prints the event to the plug-in console
toString()
Returns a string representation of the event
channel(integer)
Sets MIDI channel 1 to 16. Note: Event.channel is an event property, rather than a method, so it may be used in expressions such as (evt.channel == 1) where evt is an instance of Event)
Note – Base class for note events
Note()
Constructor
toString()
Returns a String representation of the Note event.
NoteOn – Represents a note on event
NoteOn(Event)
Constructor
pitch(integer)
Pitch from 1–127
velocity(integer)
Velocity from 0–127. A velocity value of 0 is interpreted as a note off event, not a note on.
NoteOff – Represents a note off event
NoteOff(Event)
Constructor
pitch(integer)
Pitch from 1–127
velocity(integer)
Velocity from 0–127
PolyPressure – Represents a Polyphonic aftertouch event
PolyPressure(Event)
Constructor
pitch(integer)
Pitch from 1–127
value(integer)
Pressure value from 0–127
toString()
Returns a String representation of the PolyPressure event.
ControlChange – Represents a ControlChange event
ControlChange(Event)
Constructor
number(integer)
Controller number from 0–127.
value(integer)
Controller value from 0–127.
toString()
Returns a String representation of the ControlChange event.
ProgramChange – Represents a ProgramChange event
ProgramChange(Event)
Constructor
number(integer)
Program change number from 0–127
toString()
Returns a String representation of the ProgramChange event.
ChannelPressure – Represents a ChannelPressure event
ChannelPressure(Event)
Constructor
value(integer)
Aftertouch value from 0–127
toString()
Returns a String representation of the ChannelPressure event.
PitchBend – Represents a PitchBend event
PitchBend(Event)
Constructor
value(integer)
14-bit pitch bend value from -8192–8191. A value of 0 is center.
toString()
Returns a String representation of the PitchBend event.
Fader – Represents a Fader event
Fader(Event)
Constructor
value(integer)
Fader value from 0–127
toString()
Returns a String representation of the Fader event.
TimingInfo – Contains timing information that describes the state of the host transport and the current musical tempo and meter
playing:boolean
Value is true when the host transport is running
blockStartBeat:real
Indicates the beat position at the start of the process block
blockEndBeat:real
Indicates the beat position at the end of the process block
blockLength:real
Indicates the length of the process block in beats.
tempo:real
Indicates the host tempo.
meterNumerator:integer
Indicates the host meter numerator
meterDemoninator:integer
Indicates the host meter denominator.
cycling:boolean
Value is true when the host transport is cycling
leftCycleBeat:real
Indicates the beat position at the start of the cycle range
rightCycleBeat:real
Indicates the beat position at the end of the cycle range
Contains names such as C and G# for all 128 MIDI notes
_ccNames:string[]
Contains names such as Expression and Sustain for all 128 MIDI controller numbers
noteNumber(string)
Returns the MIDI note number for a given note name. For example: C3 or B#2. Flats not permitted.
noteName(real)
Returns the name for a given MIDI note number.
ccName(real)
Returns the controller name for a given controller number
allNotesOff()
Sends the all notes off message on all MIDI channels
normalizeStatus(real)
Normalizes a value to the safe range of MIDI status bytes (128–239)
normalizeChannel(real)
Normalizes a value to the safe range of MIDI channels (1–16)
normalizeData(real)
Normalizes a value to the safe range of MIDI data bytes (0–127)
_sendEventOnAllChannels(Event)
Sends a given event to all MIDI channels
Leveraging Logic Pro Scripter for accompaniment
(click to see larger view)
Using the Guitar Strummer script that comes with Logic Pro as a starting point, I made modifications that achieve behavior including the following:
Allow selection of a music key signature and keyboard split point (see image of UI nearby)
Allow chord mode selection via a switch on LinnStrument (or pedal) that maps to a control change message. Primary modes currently consist of vanilla (major/minor/dim) vs. jazzy (maj7/min7/dom7/half dim7) chords.
When a single note below the split point is pressed, that note is output. In addition, a chord is output whose root is that note and appropriate to the chosen key signature. The chord is voiced (inversion, etc.) in a manner that assures minimal movement from the previous chord.
When two notes in the same octave below the split point are pressed, the higher note is the root of the chord output, and the lower note is output as well. This technique facilitates playing so-called slash chords.
When two notes an octave apart below the split point are pressed, the tonality toggles in most cases from major to minor and minor to major.
Anyway, that’s some of the functionality that currently exists. To give you a feel for the JavaScript code used in this script, here are most of the contents of the HandleMIDI() function, which is called at runtime whenever a MIDI event is received:
As a demonstration of the features outlined above, here’s a one-minute video of the first few measures of Feels So Good by Chuck Mangione. The LinnStrument is split, with a grand piano synth on the left and a trumpet synth on the right.
Guest article by Jeremy Cubert about imitating real instruments
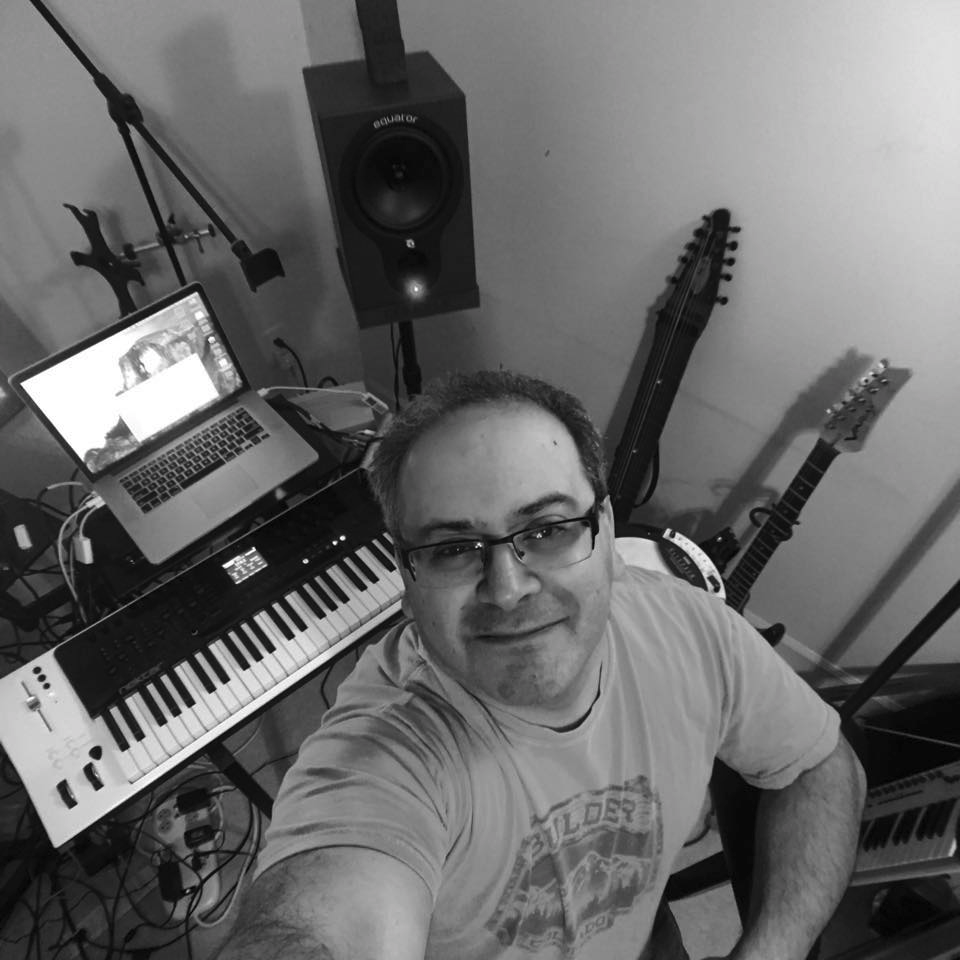
Jeremy Cubert getting “real” in his studio
Imitating “real” instruments has been the holy grail of synthesis and sampling for decades. The plethora of keyboard presets with names like guitar, violin, piano, sax, flute etc. hinted at the desire of many players to access these instruments through synthesis.
However, the desire to imitate presented at least two problems:
the sounds were not all that close to the “real” thing, and
expressiveness on standard controllers were limited.
Improvements in computer, sampling, and modeling technology have largely addressed the first problem – the sounds are indeed very, very close. However, the second problem persists and is the Achilles heel of making convincing virtual recordings and performances.
Enter the multi-dimensional controller! With LinnStrument, Roli Seaboard, Haken Continuum, the Eigenharp and others, the musician can readily add natural sounding vibrato, pitch bends, and changes in timbre through micron level movements of fingers.
So, the pieces of the puzzle may finally be in place. Now what?
In this Getting Real series of articles, I am exploring the use of the LinnStrument with sound generators designed to imitate real instruments and how to approach playing them in a realistic way. Let’s consider LinnStrument as a controller, take a look at sound generators, and discuss techniques for achieving realistic performances.
The Controller
As a Chapman Stick player, I was immediately drawn to LinnStrument because the fourths tuning of LinnStrument’s “strings” is identical to the melody side of the Chapman Stick. The combination of pressure sensitivity and the ability to slide between notes make LinnStrument an excellent choice for exploring more nuanced expression.
You can set LinnStrument to light up particular scales to guide you along its 8 rows and 200 keys. I was a little unsure of this feature at first, but it is tremendously helpful – especially when reaching for intervals (e.g., octaves, fourths, and fifths). The ability to play more than one note on a “string” has opened up new possibilities for polyphonic sound sources. Importantly, chord shapes and scales are identical anywhere on the “fretboard.”
The Sounds
The ability to play realistically on LinnStrument depends a great deal on the choice of sound, and setting both the LinnStrument and the sound source to work together. The Logic Pro X file provided on the LinnStrument website is an excellent starting point. However, I soon found myself wishing for more realistic sound generators to try. The LinnStrument website also provides links to sound generators and lists the sound generator’s features that are available to LinnStrument players. Using these resources and my own searches, I came up with the folllowing list of sound generators:
The first three on the list required a certain leap of faith because there were no demos available – either they would work well or I had made a fairly expensive mistake. AAS provided demos for me to try before buying.
As a general rule, the products that utilize sampling technology require suitable disc space, a robust hard drive, and a good quality audio interface to get the best performance. The AAS products are modeled and require little disc space, however depending on what you are doing you may need to keep on eye on your CPU meter. In my case, I did not have any technical issues with performance using LinnStrument, my MacBook and these sound generators.
Approaching Reality
I am fundamentally a piano player – I think and visualize in piano despite playing several other instruments (with varying degrees of skill). The challenge with imitating a “real” instrument is to try to impose a bit of the mindset of the instrument you are imitating in your thought process. The first instrument I attempted to imitate was drums. My brother (my best critic) would often give me feedback like “listen to real drummers – they could never do what you’re doing.” After a lot of trial and error (and use of another alternate controller, the Zendrum) my virtual drumming improved a great deal. Here are some suggested steps for approaching reality:
Step One: Think Like A “Fill-In-The-Blank” Player
Step One has both practical and abstract parts. On the practical side, understand the range of the instrument and what can be done with it. For example, some instruments are monophonic so do not play chords. For stringed instruments, it is not possible to play more than one note on a string (although possible to play the notes on different strings). Listen to players carefully to understand their phrasing, how they get from one note to the next, how they articulate notes, how they tune of the instrument, whether they play melodies or chords, and whether they play fast or slow.
Some of the sound generators make this step very easy. For example, many of the sampled instruments only bother sampling notes that are in the range of the instrument. In addition, many include the ability to add articulations either by key switching or automatically (e.g., playing legato will result in a slur or hammer on). Modeled instruments tend to give the musician more options which can lead to very interesting and musical results, but not if you are attempting to imitate the real instrument.
Step Two: Adjust The Controller To Match Your Playing To The Sound Generator
For some sound generators, I needed to adjust the velocity sensitivity on the LinnStrument to the lowest setting because the minimum amount of pressure resulted in maximum velocity and some undesirable results (squeaks, and unwanted vibrato). For other instruments, I adjusted the sensitivity on the sound generator instead. This is a trial and error process that will depend on your playing style. Importantly, the pitch bend will need to be adjusted for each instrument. For a violin, being able to slide a full octave is a wonderful feature. However, most guitar strings would break if you attempted to bend the pitch an entire octave! Imitating a slide guitar may require playing around with the pitch bend settings to obtain realistic results.
Step Three: Be Patient and Get Feedback
Trial and error is the name of the game with this process. You may be able to play some lines using these sound generators that would take twenty years to master on the real thing. On the other hand, the phrasing and transitions may be way off. Be patient with yourself as you adapt to the controller and the sound generator and do not be afraid to experiment. Get feedback from real players.
Step Four: Listen, Listen, Listen
Spend time listening to a variety of players – paying close attention to note transitions and phrasing. Try playing along with songs – preferably solo performances. For several of these instruments, I already have favorite players that I have listened to for many years (e.g., Miles Davis, Michael Brecker, and Jaco Pastorious). Having these masters as points of reference is very, very helpful. In other cases, I actually have played the instrument being imitated (e.g., trumpet, and Oud-like instrument). The modern sound generators are really quite good at getting the sound right. The trick in playing these sound generators is to provide everything else – phrasing, articulation, transitions, realistic harmonies, etc.
Final Thoughts
The sound generators I explored have not quite caught up to LinnStrument’s capabilities. For example, none of the products discussed below permit each voice to receive on a separate MIDI channel, necessary for polyphonic pitch bends and polyphonic Y-axis control.
However, that does not mean LinnStrument is not suited for playing these sounds. The combination of velocity and pressure sensitivity with the ability to bend pitch by sliding your finger provides all that is needed for realistic performances. Do not be shy about contacting plug-in developers to request new features and let them know about LinnStrument.
Future articles in this series will feature various sound generators. For a preview, here is an improvised trio piece using the Sample Modeled Saxophone, bass, and drums all improvised on the LinnStrument.
Meanwhile, happy playing!
Jeremy Cubert
Jeremy Cubert is a solo artist and member of the jazz fusion band Apothecary (www.apothecaryband.com) and international progressive rock band Formativ (www.soundcloud.com/formativ). He has recorded with Jon Anderson and Billy Sherwood of Yes and the bands Quest, Zapotec, History of Ties, and the Archaic Revival.
While primarily a piano and keyboard player, Jeremy has studied and played instruments including the Chapman Stick, LinnStrument, Zendrum, Eigenharp, guitar, Godin MultiOud, and trumpet.
Guest article by Roger Linn about exploring LinnStrument Y-axis
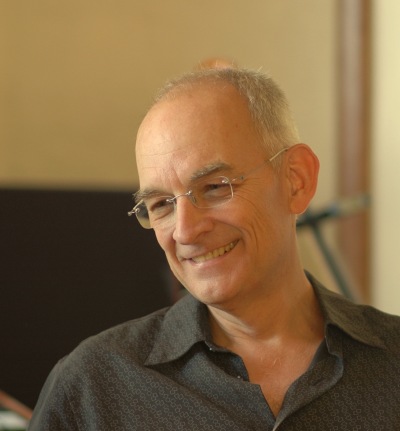
Inventor of LinnStrument: Roger Linn
James Weaver’s most recent article entitled Domo Arigato Tempo Rubato contains an overview of musical expression and some corresponding expressive capabilities of LinnStrument. That article includes a brief discussion about making expressive variations in timbre on LinnStrument by moving your fingers along the Y-axis. James reached out to me to shed additional light on Y-axis expressiveness.
For LinnStrument and other expressive instruments, the value of sensing finger pressure (Z-axis) and left/right (X-axis) movement is pretty clear: pressure controls note loudness and left/right movement controls pitch variations. However, many people are somewhat flummoxed by the concept of controlling timbre via forward/backward finger movements (Y-axis) within one of LinnStrument’s 200 note pads.
“the character or quality of a musical sound or voice as distinct from its pitch and intensity”
In the context of LinnStrument, timbre refers to variations in tone, all of which are musically useful at any note loudness or pitch. For example, bowing a violin near the bridge results in a sharper tone than bowing near the neck. Or the tone of a flute can be changed by mouth position or a sax by bite pressure. Taken together, a skilled performer’s subtle control of loudness, pitch and timbre is a big part of what makes a great instrumental solo great.
Here’s a video I made that demonstrates real time variation in loudness, pitch and timbre, using the Polysynth instrument in the new version of Bitwig Studio coming this summer:
In this video, finger pressure controls a combination of volume and filter frequency, left/right movement controls pitch, and forward/backward movement controls the timbre of the sound source, which in this case is a pulse wave oscillator. Notice how the timbre changes from thin to full as I move my finger forward and backward, and how the combined variation in loudness, pitch and timbre makes the sound very expressive. Now consider that what you’re hearing is the simplest synthesizer possible, consisting merely of an oscillator, filter and volume control and nothing else. This would sound roughly like an old telephone dialtone when played from a regular MIDI keyboard’s on/off switches.
So what can you control with the Y-axis? Ideally you’ll want to use it to vary the fundamental timbre of the source waveform. If you know a little about MIDI and synthesis, LinnStrument normally sends Y axis information using MIDI Control Change 74 messages. Here are some ideas for how to control timbre in your sound generator from these CC74 messages:
For basic analog synthesis, modulate the pulse width of a pulse oscillator. This changes the harmonic content of the pulse waveform between a thin and full tone. If you have Logic Pro X, you can hear what this sounds like. Download our LinnStrument project file from the LinnStrument Support > Getting Started page. Set your LinnStrument to the “One Channel” settings described in section 4 of that page, then select the track in the Logic file entitled “Simple 3D Pulse Synth”.
Also for basic analog synthesis, modulate the level of hard oscillator sync, which creates dramatic changes to the timbre.
Additionally for basic analog synthesis, assuming you’re using pressure to modulate the filter frequency, use the Y-axis to modulate the filter resonance.
For sampling, you can’t change the fundamental timbre of a sample, but you can use the Y-axis to vary the balance between two or more source samples. For example, one could be a soft sax tone and the other a harsh sax tone. Or one could be a sax sound and another a violin sound.
For FM (frequency modulation) synthesis, use the Y-axis to vary the frequency of the modulating oscillator, which changes the timbre of the carrier oscillator.
In summary, using the Y-axis to vary timbre during performance adds a lot of expression and emotion to your musical performance. Given that nature has graciously given this particular universe three dimensions, why not use them all?
An overview of musical expression, and some corresponding expressive capabilities of LinnStrument.
Image from wikipedia.org
“The bow can express the affections of the soul: but besides there being no signs that indicate them, such signs, even were one to invent them, would become so numerous that the music, already too full of indications, would become a formless mass to the eyes, almost impossible to decipher.”
-Giuseppe Cambini
One of the great joys of playing an instrument is expressing thoughts and feelings through it. When played in solitude, a musical instrument can act as a relief valve for accumulated stress. When played in public, it can serve as a medium for expressing musical ideas and emotions. Music played expressively can even elicit emotional responses in the listener.
Of course, instruments vary in their capabilities for expressiveness, and there are many facets of musical expression. Let’s take a look at some of these facets.
Understanding musical expression
As Giuseppe Cambini articulated in the quote cited previously, it’s not practical or even desirable to notate all the “affections of the soul” in written music. I would add that expressing ones own soul, and often the soul of the composer, is the joy and privilege of the performer. Facets of this expression include pitch variations, dynamics, timbre, and phrasing.
Pitch variations
On instruments that support it, one very effective means of expression is the act of varying of a note’s pitch while it’s being played. Common examples of this include portamento (pitch bending and sliding), and vibrato (pulsating change of pitch). In a recent conversation with Roger Linn (inventor of LinnStrument) the discussion turned to musical expression as it relates to pitch variations. Here is an excerpt of what he had to say on the subject:
“Subtle variations in pitch are, I think, the largest part of how we identify a particular performer’s style. If someone’s playing, for example, a guitar, the volume and timbre of a note can’t be changed by the performer after it’s plucked. The only thing that can be changed is the pitch. Most people that are familiar with rock guitar music would be able to identify the vibrato of Jimi Hendrix from Eric Clapton or Jeff Beck as being unique and different after only a couple of notes. But the truth is that they were all playing the same guitar, a Fender Stratocaster, through the same amplifier, a Marshall. What makes them unique and different is a particular style, in large part characterized by subtle pitch variations produced with string bends and vibratos.”
On LinnStrument, pitch variations are accomplished very naturally by moving your fingers along the X-axis as if each row is a string. To perform vibrato, wiggle your finger horizontally. To bend or slide a note, move your finger along the row to the desired ending pitch. The following brief video of the flute solo intro in The Marshall Tucker Band “Can’t You See” demonstrates slight pitch variations and vibrato on LinnStrument:
Let’s move from discussing pitch variations to examining the use of volume variations, more formally known as dynamics, for musical expression.
Dynamics
Another very effective means of musical expression is to vary the volume (loudness) of notes, which is often referred to in musical terms as dynamics. Some dynamics such as pianissimo (very soft), and sforzando (forceful accent) are concerned with the relative volume of notes when first played. Other dynamics such as crescendo (gradually becoming louder), and tremolo (pulsating change of volume) indicate changes in volume while a note is being played.
Most instruments allow you to play a note at a desired volume, but not all of them allow you to vary the volume of a note as it is being played. For example, you can vary the initial volume of a note on the piano with the velocity of a key press, but the subsequent volume of the note is not usually under your control. By contrast, most wind instruments give you continuous control of volume.
On LinnStrument, volume variations are accomplished very naturally by varying the downward (Z-axis) pressure of your fingers. To increase the loudness of a note, press harder on the note pad. To perform tremolo, repeatedly increase and decrease pressure on the note pad.
Now that we’ve discussed varying pitch (X-axis), and volume (Z-axis), we’ll move on to varying timbre (Y-axis) for a third dimension of musical expression.
Timbre
A sort of catch-all category, timbre is what makes two notes that have the same pitch and volume distinguishable from each other. For example, a note played on a trumpet has a much different timbre than that same note played on a cello. Timbre is often referred to as tone color or texture, and characterized by terms such as bright, warm, and harsh.
Varying the timbre of notes is a very effective means of musical expression, as evidenced by many of the flute solos that Ian Anderson of Jethro Tull has recorded, such as his flute solo from “My God.”
On LinnStrument, timbre variations are accomplished very naturally by rolling your fingers forward or backward on the Y-axis. The resulting variation in sound is dependent upon the corresponding feature in the synthesized instrument.
Please take a look at this video of Roger Linn demonstrating on LinnStrument the three dimensions of expression (pitch, volume, and timbre) discussed to this point.
There are, of course, more facets of musical expressions than just varying pitch, volume, and timbre. One of these facets, known as phrasing, is concerned with varying note durations:
Phrasing
One of the most natural ways to express oneself musically is to intuitively vary the duration of notes, shaping the notes in time. This concept is known as musical phrasing, and one of the core ideas is to use “stolen time” (tempo rubato in Italian) from some notes and give it to other notes.
So, domo arigato tempo rubato, portamento, vibrato, pianissimo, sforzando, crescendo, tremolo, timbre, et cetera, for enabling musical expression!
Images from wikipedia.org and rogerlinndesign.com (click to enlarge)
In the Space Odyssey series when Dr. Bowman approached the monolith in space and was pulled inside, he observed that “It’s full of stars!” I was reminded of that quote when first looking at the chord and scale constellations (shapes) superimposed on the monolith-shaped LinnStrument in the Roger Linn Design website. Please take a moment to study that page, and then refer to the following graphic from the page as we dive into relevant concepts and put them into practice.
Chord and scale shapes. Image from rogerlinndesign.com (click to view page)
Locating the C stars (LEDs)
Representing the default LinnStrument tuning, there are 17 blue LEDs on the Chord and scale shapes figure above, five of which are middle C.
Middle C. (wikipedia.org)
The five middle C LEDs are easy to locate, as they appear near an imaginary diagonal line drawn from the upper-left corner to the lower-right corner of the playing surface. On a parallel line above the middle C LEDs are four blue LEDs that represent C on the treble clef (this blog will refer to these as treble C). On a parallel line above those are two blue LEDs that represent C above the treble clef (this blog will refer to these as high C).
Similarly, on a parallel line below the middle C LEDs are four blue LEDs that represent C on the bass clef (this blog will refer to these as bass C). On a parallel line below those are two blue LEDs that represent C below the bass clef (this blog will refer to these as low C). Please take a moment to locate all of these C LEDs on the Chord and scale shapes figure above.
Using the C LEDs to locate all of the notes on the playing surface
Because the default LinnStrument tuning uses a perfect fourth musical interval between each row, any given note pad on the playing surface is a perfect fourth (five semitones) higher than the note pad directly below it. Looking at the Chord and scale shapes figure again, notice for example that the note directly above each C is always an F. By extension, the musical interval between any two note pads on the playing surface is the same as any other two note pads that have the same spacial relationship. For example, the note directly below and two columns to the right of a note pad is always a descending minor third musical interval. As a result, notice on the Chord and scale shapes figure that when the starting note is C, the note directly below and two columns to the right is always an A. By familiarizing yourself with the spacial relationships on the playing surface of the musical intervals in the following figure, you can locate all of the notes in the vicinity of a given note pad. This is useful for identifying notes relative to a C LED, or relative to a note currently being played.
Spacial relationship of intervals to a given note pad
Another aid that I’ve found helpful for memorizing the location of notes in relationship to the nearby C LEDs is the following figure:
Natural note relationships to C LEDs
Notice in the figure above that there are three blue LEDs that represent three Cs in consecutive octaves. These LEDs may be mentally lined up with blue LEDs while playing the LinnStrument to locate any note on the playing surface. For an additional aid in locating notes on the playing surface, see the following figure that contains the location of the natural notes on the musical staff:
Location of the natural notes on the musical staff (click to enlarge)
Playing scales on LinnStrument
The Chord and scale shapes figure suggests a pattern for playing a major scale in a single octave. That pattern is also represented by the C major scale in the top three rows of the Natural note relationships to C LEDs figure shown previously. There are, of course, additional patterns for a single octave major scale, one of which is represented by the C major scale in the bottom three rows on that same figure. A two octave major scale may therefore be played by combining these patterns as shown in that figure. These ideas for playing major scales may be applied to other kinds of scales as well.
Playing chords on LinnStrument
Please take another look at the Chord and scale shapes figure, noticing that it suggests shapes for some commonly used chords, including a major triad in all three inversions. There are, of course, additional shapes possible for the chords shown in the figure.
Guitar players may find some of these shapes familiar, namely the shapes that are played on guitar strings 3 and lower. For example the shape of the fingered notes in an open E chord on the guitar is the same as the major triad 2nd inversion on the Chord and scale shapes figure.
Guitar open E chord
When playing chords and scales on LinnStrument, it is beneficial to experiment with various fingerings, including the use of thumb and pinky (little finger). You’ll find that some fingerings are more comfortable than others, increasing the potential for playing accuracy. You may also find, as I do, that the pinkies are very useful in some chord and scale shapes, but they require extra practice to approach the strength and accuracy of other fingers.
Thus Spake Zarathustra
In keeping with the theme of this article, I’d like to play for you a well-known piece from Stanley Kubrick’s 1968 film 2001: A Space Odyssey on LinnStrument. This is the initial fanfare, entitled “Sunrise”, from Thus spake Zarathustra (Strauss), which demonstrates some of the concepts discussed in this article. I’ve taken the liberty of annotating the triads and their inversions in the video.
 As a Quantum Developer Advocate for IBM, I present at conferences about quantum computing, and have developed an open source application that utilizes IBM quantum computers to compose and perform music. The name of the application is Quantum Music Composer, and it works with IBM quantum simulators and computers. The style of music that it helps compose and perform is a very simplified version of 17th century counterpoint. The image at the top of this article, for example, is a music score captured from an improvisational composition by an IBM 16 bit quantum computer.